Tesla Model X: Turn Signals
To engage a turn signal, press the corresponding arrow button on the left side of the steering yoke. A turn signal cancels based on the angle of the steering yoke (for example, you finish making a turn). You can also cancel a turn signal by pressing the turn signal button a second time.
If Controls > Pedals & Steering > Automatic Turn Signals is set to Auto Cancel, turn signals cancel automatically when Model X detects completion of a maneuver such as a merge, lane change, or a fork in the roadway. You can override automatic cancellation at any time (for example, you want the turn signal to remain on because you are making more than one lane change). To override, engage the turn signal by pressing and momentarily holding the turn signal button (instead of just pressing). Then, when the first maneuver is complete, the turn signal remains on. If Automatic Turn Signals is set to Off, you must cancel the turn signal manually by pressing the turn signal button after maneuvers such as a merge, lane change, or fork in the roadway.
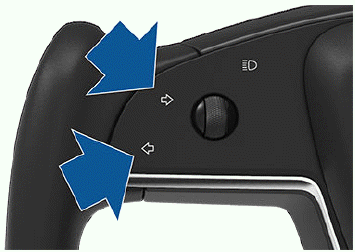
When a turn signal is operating, the corresponding indicator lights up on the instrument panel and you can hear a clicking sound.
.png)
.png)
Hazard Warning Flashers
To turn on the hazard warning flashers, press the button on the drive mode selector located at the front of the center console. All turn signals flash. Press again to turn off.
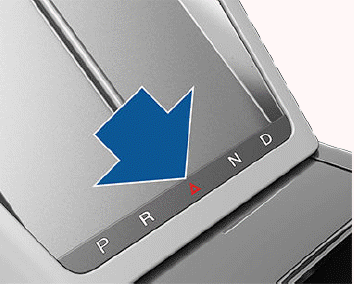
NOTE: Hazard warning flashers operate even without a key nearby.
READ NEXT:
 Instrument Panel Overview
The instrument panel changes depending on whether Model X is:
Off or Parked (shown below).
Driving (see Instrument Panel - Driving).
Charging (see Charging Instructions).
When Model X is off or P
Instrument Panel - Driving
When Model X is driving (or ready to drive), the instrument panel shows your
current driving status and a real-time
visualization of the road as detected by the Autopilot components (see About
Auto
SEE MORE:
Module - 2nd Row Seat - LH (Remove and Replace)
Installation
Remove the LH 2nd row seat back cover (refer to procedure).
Disconnect the 2 harnesses from the module.
Remove the fasteners (x3) that secure the module to the seat
(torque 1 Nm)
Drive Unit - Rear - Large (Remove and Replace)
Note: Loosen suspension fasteners by hand, then use a
cordless electric drill with a 3/8 in drive adapter and an 3/8
in drive air ratchet wrench.
Removal
Remove the drive unit (refer to procedure).
Installation
Note: Perform the Installation section of
40010701, "Dri
