Tesla Model X: Actuator - Latch - Hood (Remove and Replace)
Tesla Model X 2015-2026 Service Manual / Closures / Actuator - Latch - Hood (Remove and Replace)
Removal
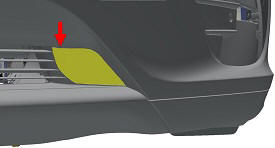
- Use a trim tool to remove the tow hook cover.
Note: Insert the trim tool into the notch at the top right portion of the tow hook cover.
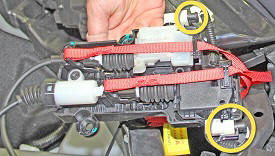
- Release both hood latch manual release straps.
- Remove the front underhood storage unit (refer to procedure).
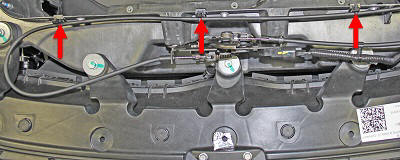
- Remove the bolts (x3) that secure the actuator bracket to the
front end module (FEM) (torque 10 Nm).
Note: Components have been removed in this graphic to aid clarity.

- Lift the actuator assembly above the FEM.
- Release the electrical connectors (x2) from the bottom of the
actuator assembly.
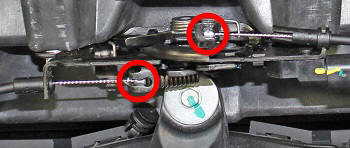
- Release the edge clips (x3) that secure the hood latch cable to
the FEM.
Caution: Replace any broken clips.
- Release both hood latch cables (x2) from the latch assembly.
- Release the post clip from the 12V harness.
- Remove the actuator from the vehicle.
Installation procedure is the reverse of removal.