Tesla Model X: Power Strut - Liftgate - LH (Remove and Replace)
Tesla Model X 2015-2026 Service Manual / Closures / Power Strut - Liftgate - LH (Remove and Replace)
Removal
- Open the liftgate.
- Open both rear doors.
- Power the 2nd row seats fully forward for access.
- Remove the LH C-pillar upper trim (refer to procedure).
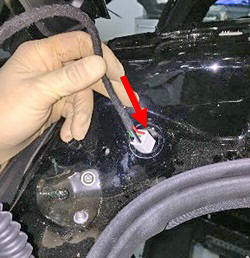
- Disconnect the power strut electrical harness connector.
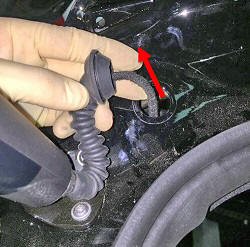
- Release the grommet on the liftgate and pull the power strut
harness and electrical connector out through the body cavity.
- Use a telescoping bar to support the liftgate in the open position. Tip: Position the support bar against the bracket for better support.
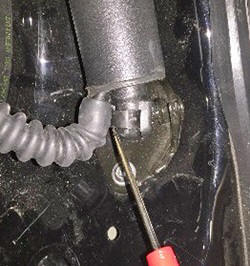
- Release the locking tab that secure the top of the power strut
to the body.
- Release the locking tab that secure the bottom of the power
strut to the body.
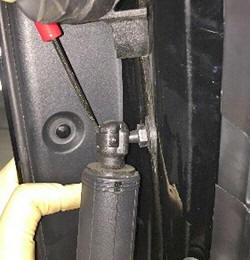
- Release the power strut from the ball joints.
- Remove the power strut from the vehicle.
Installation procedure is the reverse of removal, except for the following:
- If necessary, apply grease to the grommet before routing the
power strut harness through the body cavity.
- Ensure that the liftgate opens and closes properly prior to installing the components that were removed for access.
- Move the 2nd row seats back to their original positions.