Tesla Model X: Rear Door Spring - Front - LH (Remove and Replace)
Tesla Model X 2015-2026 Service Manual / Closures / Rear Door Spring - Front - LH (Remove and Replace)
Removal
- Remove the spine closing plate (refer to procedure).
- Remove the center spine applique (refer to procedure).
- Remove the LH rear door primary seal (refer to procedure).
- Remove the LH upper racetrack trim (refer to procedure).
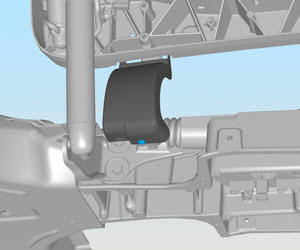
- Remove the LH front fastener that secures the hinge cover
(torque 5 Nm).
- Remove the LH carrier bracket from the body:
- Working from outside the vehicle, remove the screws that
secure the carrier bracket to the body (torque 1.5 Nm).

- Working from inside the vehicle, remove the nuts that secure
the carrier bracket (torque 1.5 Nm).
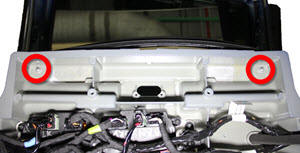
- Remove the LH carrier bracket from the vehicle.
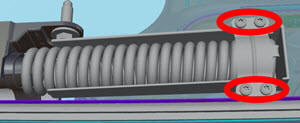
- Working from outside the vehicle, remove the screws that
secure the carrier bracket to the body (torque 1.5 Nm).
- Remove the front and rear primary rear door struts (refer to procedure).
- Remove the front and rear secondary rear door struts (refer to procedure).
- Release the screws that secure the spring cover bracket (torque
5 Nm).
- Remove the spring from the vehicle..
Installation procedure is the reverse of removal, except for the following:
After installing the spring, close the door to ensure that the spring functions properly and that the door does not require adjustment.