Tesla Model X: Air Suspension Lines - Front (Remove and Replace)
Tesla Model X 2015-2026 Service Manual / Suspension / Air Suspension Lines - Front (Remove and Replace)
Remove
- Position the vehicle on a lift, but do not raise the vehicle at this time.
- Use the Toolbox "Air Suspension Fill/Deflate" panel to depressurize the system.
- Remove the cowl panel (refer to procedure).
- Remove the HEPA filter duct (refer to procedure).
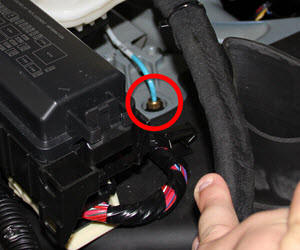
- Release the blue line from the top of the LH front shock tower
(torque 2 Nm).
- Working from the LH side of the vehicle to the RH side, release the clips that secure the blue air line. Pull the blue line toward the LH side of the vehicle.
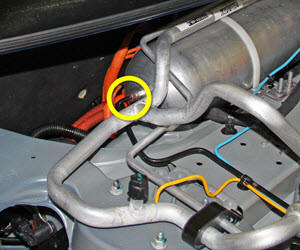
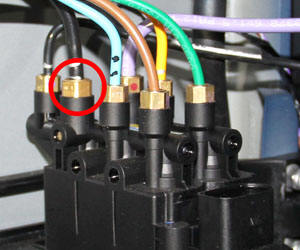
- Release the black air line from the RH side of the air
suspension reservoir (torque 3.5 Nm).
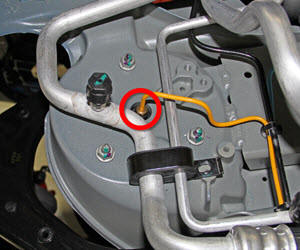
- Use a crowfoot extension to release the yellow air line from the
top of the RH front shock tower (torque 2 Nm).
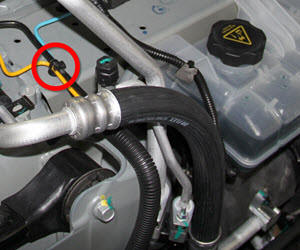
- Release the clip that secures the air lines to the front
crossmember.
- Remove the RH front arch liner (refer to procedure).
- Disconnect the electrical connectors from the air suspension
compressor.
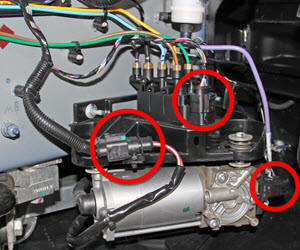
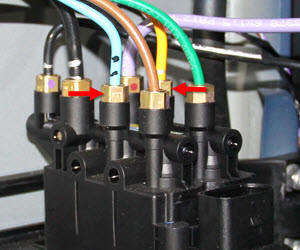
- Release the nut that secures the larger diameter black line from
the air suspension reservoir (torque 3.5 Nm).
- Release the nuts that secure the blue and yellow lines from the
2 front air springs (torque 2 Nm).
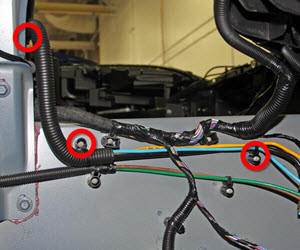
- Disconnect the 3 clips that secure the air line bundle to the
body.
- Remove the front air suspension line bundle from the vehicle.
Installation procedure is the reverse of removal.