Tesla Model X: Cross Car Beam (Remove and Replace)
Tesla Model X 2015-2026 Service Manual / Instrument Panels / Cross Car Beam (Remove and Replace)
Removal
- Fully open both front doors.
- Move both front seats to their rearmost positions.
- Adjust the steering column:
- Lower the steering column to its lowest position.
- Fully extend the steering column.
- Open the glove box.
- Remove the underhood storage unit (refer to procedure).
- Recover the A/C refrigerant (refer to procedure).
- Remove the wiper motor assembly (refer to procedure).
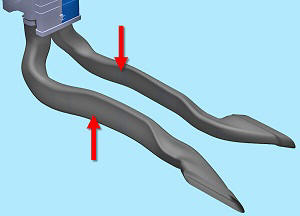
- Remove the bolts (x2) that secure the wiper mount bracket to the
crossmember (torque 20 Nm).
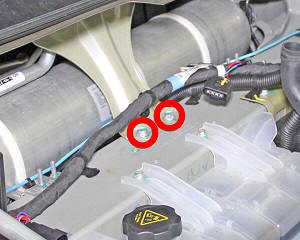
- Release the fir tree clip that secures the 12V harness to the wiper mount bracket.
- Remove the nuts (x2) that secure the wiper mount bracket to the
studs on the bulkhead (torque 20 Nm).
- Remove the wiper mount bracket from the vehicle.
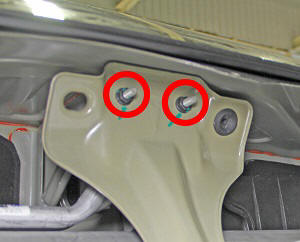
- Remove the bolts (x2) that secure the thermal expansion valve (TXV)
to the bulkhead (torque 6 Nm).
- Carefully pull the charge port high/low pressure pipes and TXV assembly away from the bulkhead. Caution: Take care not to damage component(s).
- Remove the defrost mesh grille assembly (refer to procedure).
- Remove the center console assembly (refer to procedure).
- Remove the front HVAC outlet duct.
Note: Components have been removed in this graphic
to aid clarity.
- Remove the 2nd row passenger ducts.
Note: Components have been removed in this graphic to aid clarity.
- Remove the instrument cluster (refer to procedure).
- Remove the MCU/touch screen (refer to procedure).
- Remove the passenger's knee air bag (refer to procedure).
- Remove the steering column (refer to procedure).
- Remove the screws (x18) that secure the IP carrier to the dash frame (torque 2 Nm).
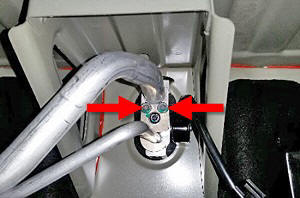
- Disconnect the electrical connector from the dash tweeter.
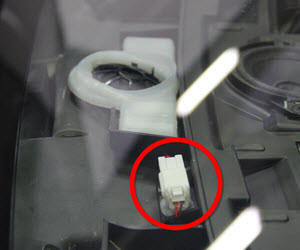
- Lift the IP carrier up, then release the clip that holds the dash tweeter electrical harness to the IP carrier.
- Remove the IP carrier from the vehicle.
- Fold back the carpet on the passenger's side footwell.
- Remove the passenger false floor from the vehicle.
- Disconnect the electrical connectors (x2) from the Driver's Assistance module.
- Remove the screws (x4) that secure the Autopilot ECU module (torque 3.5 Nm).
- Remove the Autopilot ECU module from the vehicle.
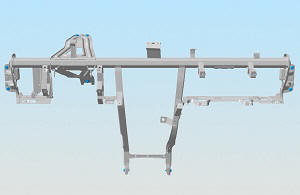
- Remove the fasteners that secure the cross car beam to the body
of the vehicle (torque 27 Nm).
- Disconnect all electrical connectors, including those that are connected to the PSRCM, cabin fuse boxes, and body control module (BCM).
- Remove the cross car beam from the vehicle.
Note: The cross car beam is removed with the electrical harness attached.
InstallationInstallation procedure is the reverse of removal, except for the following:
- Record the routing of the instrument panel harness and the positions of the edge clips on the old cross car beam.
- Transfer the instrument panel harness to the new cross car beam. Ensure that all edge clips are in the original locations.