Tesla Model X: Control Arm - Upper - Front - LH (Remove and Replace)
Removal
- Position the vehicle on a lift but do not lift it at this time.
- Disconnect 12V power (refer to procedure).
- Remove the bolts that secure the underhood fuse box bracket to
the body (torque 7 Nm).
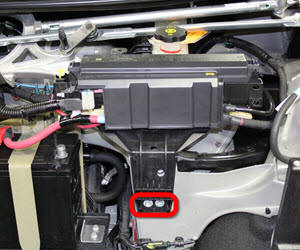
- Gently move the underhood fuse box to the right to provide access.
- Remove the front LH wheel arch liner (refer to procedure).
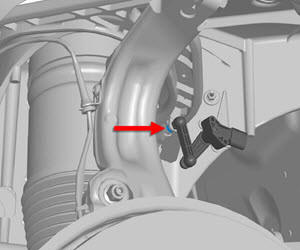
- Remove the nut that secures the ride height sensor lever to the
upper control arm (torque 7 Nm).
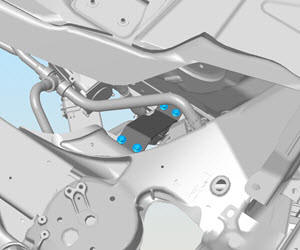
- Move powertrain coolant pump 2 to gain access to the rear bolt
that secures the upper control arm to the body.
- Disconnect the electrical connector from the pump.
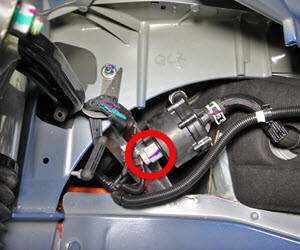
- Slide the pump upward, off the bracket.
- Remove the bolt that secures the pump bracket to the support
bracket (torque 5 Nm).
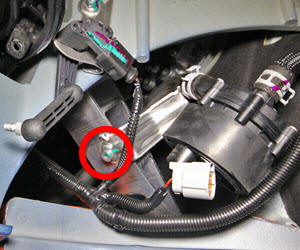
- Remove the pump bracket from the support bracket.
- Release the harness clip on the upper inner side of the support bracket.
- Remove the bolts that secure the support bracket to the body
(torque 10 Nm).
- Remove the support bracket from the vehicle.
- Disconnect the electrical connector from the pump.
- Release the rubber grommets that secure the front wheel speed
sensor harness to the body and the knuckle.
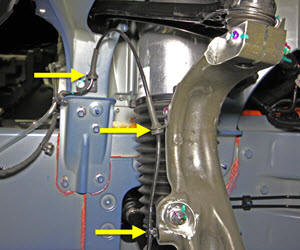
- Remove and discard the bolt and nut that secure the upper
control arm ball joint to the knuckle (torque 60 Nm).
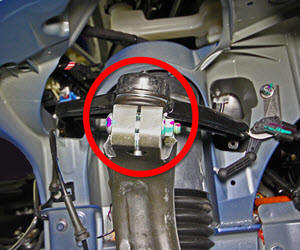
- Release the upper control arm from the knuckle.
- Remove the bolts that secure the upper control arm to the body
(torque 68 Nm).
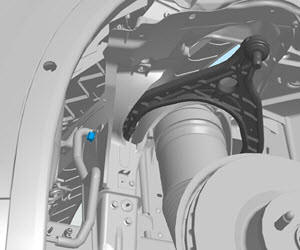
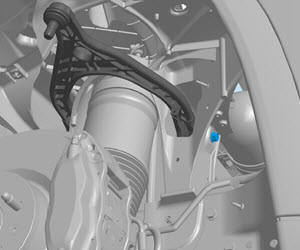
- Release the upper control arm and remove it from the vehicle.
Installation procedure is the reverse of removal, except for the following:
Caution: Only fully tighten suspension bushing fasteners when the vehicle is in ride height position.
Note: Clean the affected areas before installation.
Note: When tightening a nut and bolt assembly, hold the bolt while torquing the nut.
Perform a four wheel alignment (refer to procedure)