Tesla Model X: Tail Light Assembly - RH (Remove and Replace)
Tesla Model X 2015-2026 Service Manual / Electrical / Tail Light Assembly - RH (Remove and Replace)
Removal
- Remove the subwoofer (refer to procedure).
-
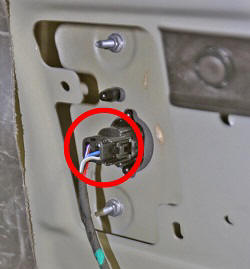
Disconnect the electrical connector from the
tail light.
-
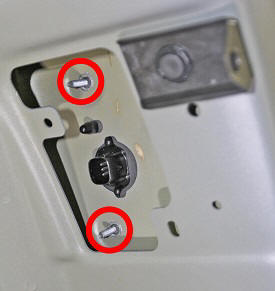
Remove the fasteners (x2) that secure the tail
light to the body (torque 2.5 Nm).
-
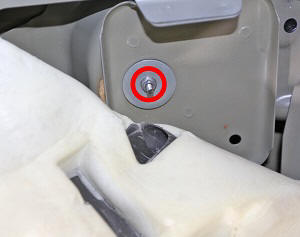
Release the acoustic padding and remove the
fastener that secures the tail light to the body (torque 2.5 Nm).
- Remove the tail light assembly from the vehicle.
- Place the tail light on a soft, clean surface.
-
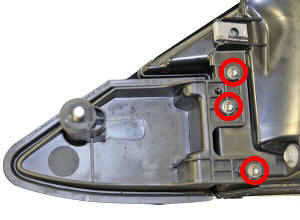
Remove the screws (x3) that secure the dummy
charge port door to the tail light (torque 1.25 Nm).
- Remove and retain the dummy charge port door.
Installation procedure is the reverse of removal, except for the following:
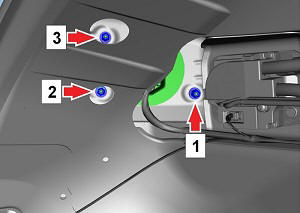
-
Prior to installing the components that were
removed for access, insert a 1 mm feeler gauge between the body and
the base of the tail light. While holding the feeler gauge in place,
tighten the nuts in the order shown (torque 2.5 Nm).
Note: The following images show the LH tail light. The RH tail light is mirrored.
Feeler gauge inserted Torque order 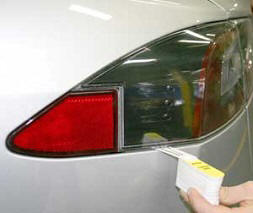
- Ensure proper operation of the tail light.