Tesla Model X: Door - Charge Port (Remove and Replace)
Tesla Model X 2015-2026 Service Manual / High Voltage System / Door - Charge Port (Remove and Replace)
Note: The charge port door and motor are removed as an assembly.
Removal
- Remove the LH tail light assembly (refer to procedure).
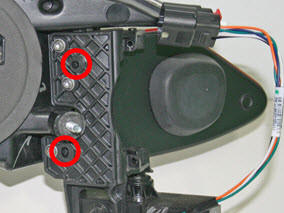
- Remove the screws (x3) that secure the charge port door to the
tail light assembly (torque 1.25 Nm).
Note: The charge port door and motor are removed as an assembly.
.
.jpg)
- Remove the charge port door from the LH tail light assembly.
Retain the tail light assembly.
.
.jpg)
Installation procedure is the reverse of removal, except for the following:
- Ensure that the studs on the tail light align with the slots on
the charge port door before installing the screws.
.
- Perform the "Charge Port Latch Calibration":
- Connect a laptop with Toolbox 2.0 or later to the vehicle.
- Navigate to Panels > Charging > Charge Port Latch Calibration.
- Click Start/Play.
- Follow the onscreen instructions.