Tesla Model X: Drive Unit - Rear - Large (Remove)
Tesla Model X 2015-2024 Service Manual / Rear Drive Unit / Drive Unit - Rear - Large (Remove and Install) / Drive Unit - Rear - Large (Remove)
Special tools required for this procedure:
| Supplier | Part Number | Description |
| Tesla | 1000991 | Axle Extractor Note: Use 1000991 for a large drive unit only. |
| Tesla | 1057312-00-A | Axle Extractor Note: Use 1057312-00-A for either a large or small drive unit. |
- Remove the rear subframe (refer to procedure).
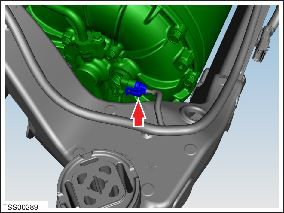
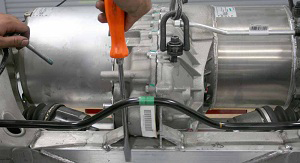
- Disconnect the motor encoder.
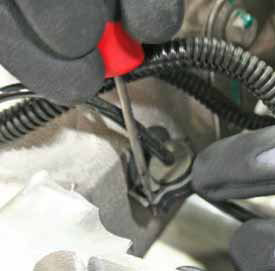
- Release the wheel speed sensor harnesses from the grommets on
the subframe.
- On both sides of the subframe, release the bolt that secures the upper link to the knuckle (torque 140 Nm).
- On both sides of the subframe, release the bolt that secures the toe link to the knuckle (torque 130 Nm).
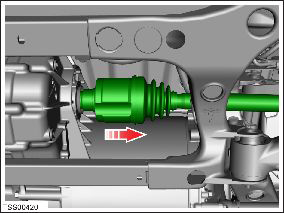
- Use the axle extractor tool to release the halfshafts from the
transmission.
Caution: Ensure that the axle extractor tool does not contact any of the differential retaining studs.
Caution: Do not let the halfshafts rest on the input seal.
Tip: It might be helpful to loosen the nut that secures the upper link to the subframe. This provides additional clearance when installing the halfshafts.
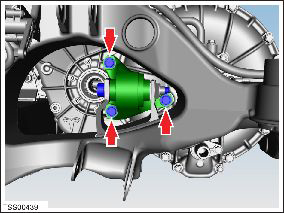
- Secure the gantry bolts (x3) to the drive unit. Note: Secure the short bolt to the motor section of the drive unit.
- Loosen the nuts that secure the front and rear motor mounts to
the subframe (torque 90 Nm).

- Loosen the bolts (x3) that secure the motor to the side motor
mount. (torque 22 Nm).
Tip: It might be helpful to only use the gantry bolt
that secures to the motor. This allows the drive unit to be
rotated to better align the bolt holes.
- Remove the bolt that secures the front motor mount (torque 90 Nm).
- Remove the bolt that secures the rear motor mount (torque 90 Nm).
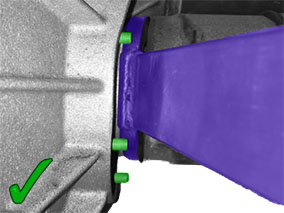
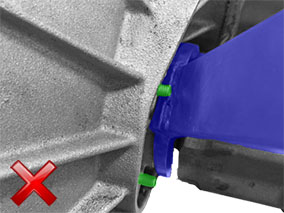
- Carefully lift the drive unit assembly, making sure to clear the rear of the subframe.
Caution: Do not damage the motor encoder plastic housing.