Tesla Model X: Drive Unit - Rear - Large (Installation)
Tesla Model X 2015-2024 Service Manual / Rear Drive Unit / Drive Unit - Rear - Large (Remove and Install) / Drive Unit - Rear - Large (Installation)
Installation
Installation procedure is the reverse of removal, except for the following:Caution: Replace all Patchbolt(s).
Caution: Replace all nylon-insert locknuts.
Caution: Ensure that the new halfshaft has a snap-ring already installed. If it does not, then install a different halfshaft that has a snap-ring already installed. Return any halfshafts without a snap-ring using the MRB process. Do not remove or reuse snap-rings.
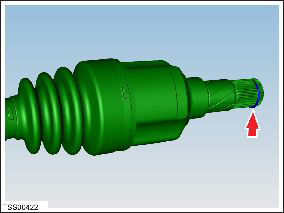
- When installing the halfshaft into the drive unit:
- Ensure that the opening of the snap ring is facing towards the bottom of the drive unit.
- Do not damage or displace the oil seal.
- Verify that the halfshaft is fully seated by carefully pushing it into the drive unit until there is an audible "click" from the snap ring.
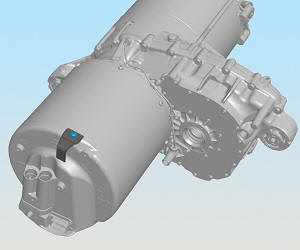
- Ensure that the drive unit is equipped with a bracket that
correctly routes the HV cables. If necessary, install a screw
and bracket to correctly route the HV cables (torque 8 Nm).
Note: Components have been removed in this graphic
to aid clarity.
- If both the front and rear drive units were removed at the same time, the vacuum refill tool must be used to refill the cooling system (refer to procedure).
- Refill the gearbox with the recommended fluid.
- Transfer the vehicle to a 4 post lift (refer to procedure).
- Air suspension only: Set the suspension height to "Normal".
- Caution: Only fully tighten suspension nuts and bolts when the vehicle is on a 4-post lift and the suspension is in the ride height position.
- Perform a four wheel alignment (refer to procedure).
-
Use Toolbox to update or redeploy the firmware:
- If the vehicle is not running the latest firmware, run the "Vehicle Firmware Update" procedure.
- If the vehicle is running the latest firmware, run the "Firmware Redeploy" procedure.