Tesla Model X: Front Door Drive Unit - LH (Remove and Replace)
Tesla Model X 2015-2026 Service Manual / Closures / Front Door Drive Unit - LH (Remove and Replace)
Remove
- Position the door approximately 80% of the way open.
- Remove the window glass (refer to procedure).
- Remove and discard the glass run channel, if installed (refer to procedure).
- Disconnect 12V power (refer to procedure).
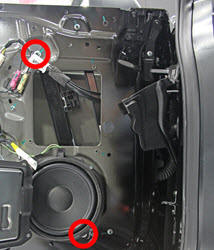
- Remove the front nuts (x2) that secure the regulator (torque 10
Nm).
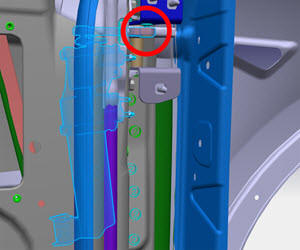
- Push the front regulator track outboard to provide access to the front door drive unit.
- Use a small pry bar to push the push the linkage down and
disconnect it from the ball stud. Remove and discard the plastic
cap.
Caution: Ensure that 12V power is disconnected
before disconnecting the linkage and ball stud.
- Disconnect the electrical harness connector from the front door drive unit.
- Release the nuts (x3) and bolt (x1) that secure the front door
drive unit to the door (torque 14 Nm).
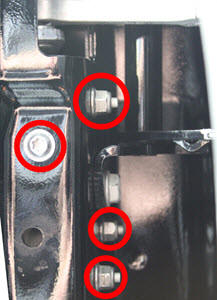
- Remove the front door drive unit from the door.
Installation procedure is the reverse of removal, except for the following:
- Record the serial number of the new front door drive unit.
- Install a new plastic cap on the ball stud before installation.
- Use pliers to reattach the linkage to the ball stud. Caution: Use a cloth or other soft material between the hinge and the pliers to protect the painted surface of the hinge.
- Connect a laptop with Toolbox to the vehicle.
- In Toolbox, use the Power Front Door Calibration panel to calibrate the front door drive unit.
- Do not reinstall the glass run channel. The glass run channel is an obsolete component.