Tesla Model X: Heater - Front PTC (Remove and Replace)
Warning: Only technicians who have been trained in High Voltage Awareness are permitted to perform this procedure. Proper personal protective equipment (PPE) and insulating HV gloves with a minimum rating of class 00 (500V) must be worn any time a high voltage cable is handled. Refer to Tech Note TN-15-92-003, "High Voltage Awareness Care Points" for additional safety information. Removal
- Open the hood.
- Open both front doors and windows.
- Move the passenger seat rearward for access.
- Remove the cowl screen panel (refer to procedure).
- Perform the electrical isolation procedure (refer to procedure).
- Disconnect the PTC heater HV cable connector from the forward
junction box (FJB).
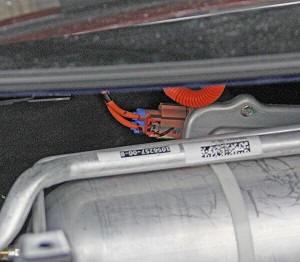
- Push the HV cable grommet through the bulkhead towards the
interior of the vehicle.
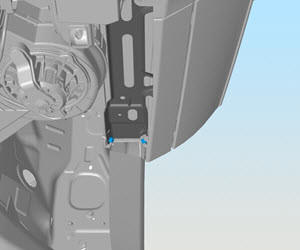
- Remove the front passenger's knee air bag (refer to procedure).
- Remove the passenger's knee air bag bracket:
- Remove the screws (x3) that secure the front of the bracket
to the instrument panel (torque 2.3 Nm).
- Remove the bolts (x2) that secure the LH side of the bracket
to the instrument panel (torque 6 Nm).
- Remove the bolts (x3) that secure the rear of the bracket to
the instrument panel (torque 6 Nm).
Note: Components have been removed in this graphic to aid clarity.
- Remove the screws (x3) that secure the front of the bracket
to the instrument panel (torque 2.3 Nm).
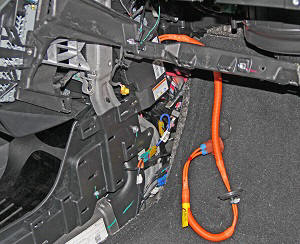
- Release the passenger footwell duct from the instrument panel.
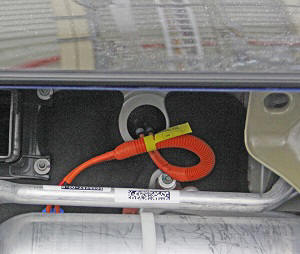
- Release the HV cable from the retaining clips on the HVAC assembly.
- Carefully pull the HV cable through the bulkhead into the cabin
of the vehicle.
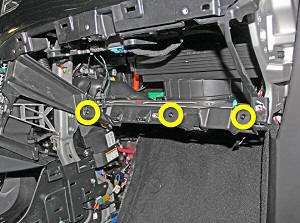
- Remove the screws (x3) that secure the PTC heater to the front
HVAC assembly (torque 1.2 Nm).
Note: Components have been removed in this graphic to aid clarity.
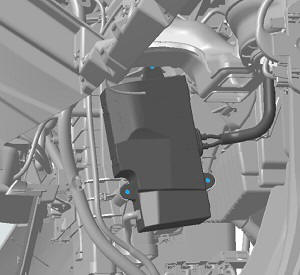
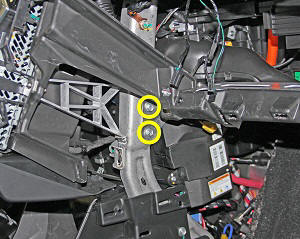
- Disconnect the electrical connector from the PTC heater.
Note: Components have been removed in this graphic to aid clarity.

- Pull the PTC heater away from the HVAC assembly and remove it from the vehicle.
Installation procedure is the reverse of removal, except for the following:
Caution: Replace all Patchbolt(s).
- Clean the interior of the HVAC casing prior to assembly.
- Use Toolbox to update or redeploy the firmware.