Tesla Model X: HV Rapid Splitter Vehicle Side (Replace)
Tesla Model X 2015-2024 Service Manual / High Voltage System / HV Rapid Splitter Vehicle Side (Remove and Replace) / HV Rapid Splitter Vehicle Side (Replace)
Installation
Installation procedure is the reverse of removal, except for the following: Tip: If the forward HV cable grommet is difficult to insert into the body, apply P-80 emulsion to the edges of the grommet.- Inspect the retaining springs before installing the locking
collars. Ensure that the retaining spring is seated correctly.

Retaining spring seated correctly

Retaining spring seated incorrectly

Retaining spring seated incorrectlyRetaining spring seated correctly Retaining spring seated incorrectly Retaining spring seated incorrectly - Use the installation tool to install both locking collars in the
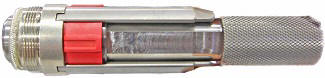
Rapid splitter.
Note: Install both locking collars into the Rapid
Mate before installing either of the HV cables.
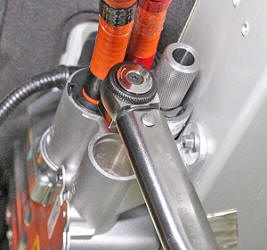
- Use the flare nut crowfoot wrench at 90 degrees from the torque
wrench when torquing the collar (torque 35 Nm).
Caution: If the flare nut crowfoot wrench is not 90 degrees from the torque wrench, it can damage the special tool and/or the rapid splitter.
- After inserting the new HV cables into the Rapid Splitter, perform pull test to ensure that the cables are correctly installed. Note: The HV cables must be pulled with a force of 150N.
- Install the O-rings on the HV cables:
- Place the seal installation tool over the terminal.
- Apply P-80 emulsion to the seal installation tool.
- Push the O-ring along the seal installation tool until it
slides onto the HV cable.
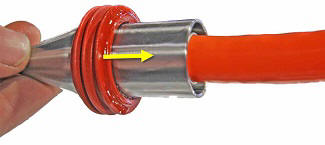
- Remove the seal installation tool from the HV cable.
- Perform steps a-d on the other HV cable.