Tesla Model X: Latch Actuator - 2nd Row Seat - LH (Remove and Replace)
Tesla Model X 2015-2026 Service Manual / Seats / Latch Actuator - 2nd Row Seat - LH (Remove and Replace)
Removal
- Remove the LH 2nd row seat back cover (refer to procedure).
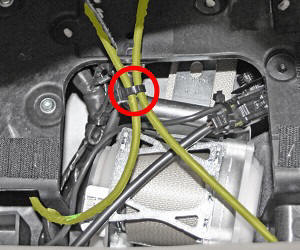
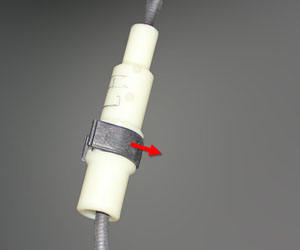
- Remove the latch cable from the actuator, then remove the cable
from the bracket.

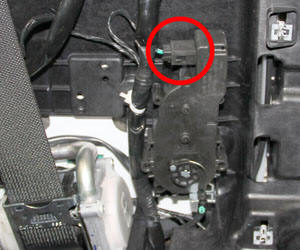
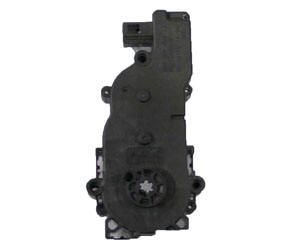
1 Actuator latch cable 2 Cable bracket - Disconnect the harness from the latch actuator.
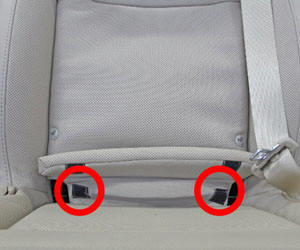
- Gently lift the bottom corners of the 2nd row seat backrest
cushion, then gently pull up on the bottom corners of the cushion to
expose the seat internals.
Note: Do not remove the cushion from the seat; the seat heater harness remains connected during this procedure.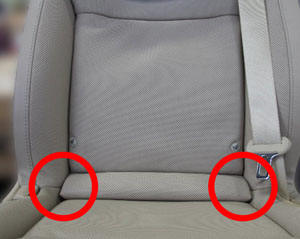
- Working from the front of the seat, remove the fasteners that
secure the latch actuator (torque 1 Nm).
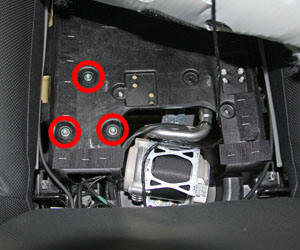
- Working from behind the seat, remove the latch actuator.
- Install the new actuator and fasteners.
- Secure the latch cable to the actuator and the bracket.
- Connect the latch actuator harness.
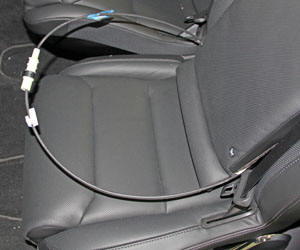
- Pull the latching cable out of the seat back.
Note: On some vehicles, the latching cable might be secured to the seat back with a cable tie. Cut the cable tie; ensure that a new cable is reinstalled during installation.
Note: On some vehicles, the sides of the latching cable are secured together with a cable tie. Do not cut this cable tie.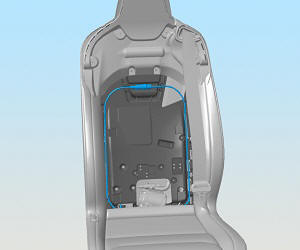
- Connect a laptop with Toolbox to the vehicle.
- Use the Seat Install panel to pitch the seat fully backward.
- Use the Seat Install panel to unlatch the seat.
- Use the Seat Install panel to pitch the seat fully forward.
- Unlock the latching cable by pulling on the U-shaped locking
connector.
- Use the Seat Install panel to pitch the seat fully backward.
- Use the Seat Install panel to pitch the seat fully forward.
- Lock the latching cable.
- Use the Seat Install panel to pitch the seat fully backward.
- Use the Seat Install panel to latch the seat.
- Use the Seat Install panel to pitch the seat downward until it stops.
- Use the Seat Install panel to run the seat calibration.
- Secure the latching cable inside the seat back. Note: If the cable was secured to the seat back with a cable tie, install a new one.
- Resecure the backrest cushion.
- Reinstall the seat back cover.