Tesla Model X: Seat Assembly - 3rd Row (Remove and Replace)
Removal
- Open both rear doors and the liftgate.
- Move the 2nd row seats into "Easy Entry" mode.
- Remove the trunk load floor.
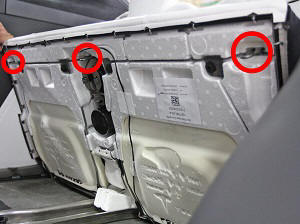
- Carefully lift the front of the 3rd row seats to release the
clips (x3) that secure them to the body of the vehicle.
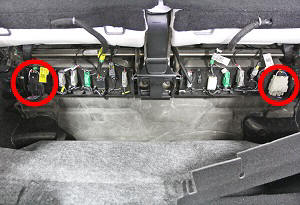
- Pull the trunk floor carpet towards the rear of the vehicle to gain access to the connectors on the rear of the 3rd row seats.
Note: Do not remove the trunk floor carpet entirely.
- Disconnect the electrical connectors (x2).
- Remove and discard the bolts (x4) and washers (x4) that secure
the front of the 3rd row seats to the body of the vehicle (torque 34
Nm).
Note: Components have been removed in this graphic to aid clarity.
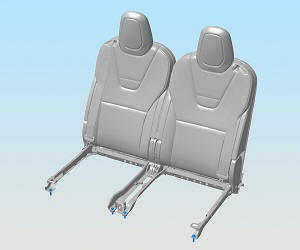
- Remove and discard the bolts (x4) and washers (x4) that secure
the rear of the 3rd row seats to the body of the vehicle (torque 34
Nm).
Note: Components have been removed in this graphic to aid clarity.
Note: The bolts have adhesive patch material. If they are difficult to remove, perform the following to melt the adhesive patch material using an inductive heater:

Warning: Persons that have a pacemaker or any other kind of electronic or metal surgical implant must stay at least 1 m (3 ft) away from the inductive heater while it is in use.
Warning: Remove all metallic items (such as coins, keys, electronics, and tools) from pockets before using the inductive heater.
Warning: Ensure that there is a properly-maintained fire extinguisher in the work area before using the inductive heater.
Warning: Use the inductive heater in a well-ventilated area.
- Move any adjacent wiring harnesses away from the work area.
- Position the heater coil around the bolt, then heat the bolt for 20 seconds.
- Allow the bolt to cool for 2 minutes. Warning: The inductive heater coil, bolt, and adjacent areas will be extremely hot.
- Remove and discard the bolt.
- Use a coated straight flute cut tap to chase the threads. Note: Do not lubricate the tap. Note: Start the tap by hand. Once the tap is fully engaged in the threads, a tap handle can be used for additional leverage.
Note: Wrap seat frame components with shop cloths to avoid damaging interior trim panels during seat removal.
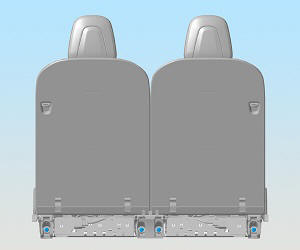
- Remove the 3rd row seats from the vehicle.
Installation procedure is the reverse of removal, except for the following:
- Transfer the lower seat cushion to the new 3rd row seat frame,
if necessary:
- Disconnect the seat cushion harness connectors from the seat electrical harness.
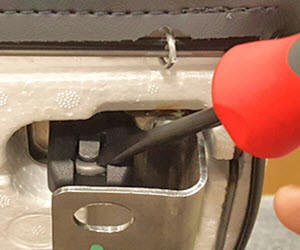
- Using a flathead screwdriver, insert and gently pry to the
right while pushing the cushion upward to release the cushion.
Repeat this step for all three areas.
- Transfer the seat cushion to the new seat frame.
- Connect the seat cushion harness connectors to the new seat frame electrical harness.
- Move the 2nd row seats back to their original positions.
- Ensure that the 3rd row seats function properly.