Tesla Model X: Panel - Door Trim - LH - Rear (Remove and Install)
Tesla Model X 2015-2026 Service Manual / Interior Trim / Panel - Door Trim - LH - Rear (Remove and Install)
Removal
- Remove the lower rear door garnish (refer to procedure).
- Set the rear door to a comfortable working height.
- Move the driver's seat fully forward.
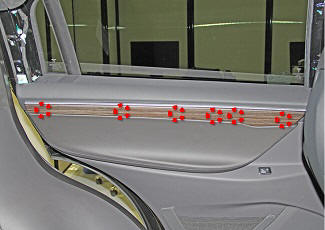
- Use a trim tool to release the small clips (x6) that secure the
decorative trim to the door panel.
Caution: Take care not to damage component(s).
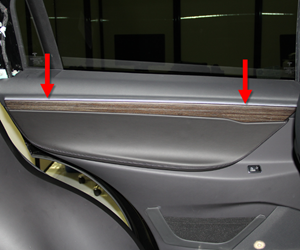
- Use a trim tool to release the large metal clips (x2) that
secure the decorative trim to the door panel.
- Remove the bolts (x8) that secure the door trim panel to the
rear door (torque 6 Nm).
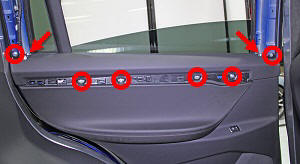
- Using a trim tool, release the heart flex clips (x13) that secure the rear door trim panel. Caution: Take care not to damage component(s).
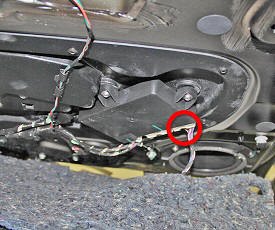
- While supporting the door trim panel, disconnect the forward
electrical connector from the rear door controller.
- Remove the door trim panel from the vehicle and place it on a flat, clean surface.
Installation procedure is the reverse of removal, except for the following:
Caution: Replace any broken clips.