Tesla Model X: Active Louver - Center (Remove and Replace)
Removal
- Remove the front fascia (refer to procedure).
- Raise and support the vehicle (refer to procedure) Warning: Do not work on an incorrectly supported vehicle.
- On each side of the vehicle, release the clip that secures the
active louver.
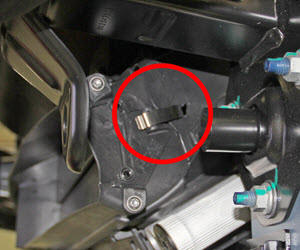
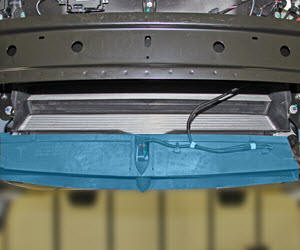
- Release the active louver from the condenser fan module by
pushing up on the base of the louver, then rotating the top toward
the front of the vehicle. Do not completely remove the louver from
the vehicle at this time.
Note: At this time, there is still a harness connected to the active louver. Continue to support the louver during the next step; do not allow the louver to hang from the harness.
- Release the edge clips that secure the louver harness to the
louver, then disconnect the harness.
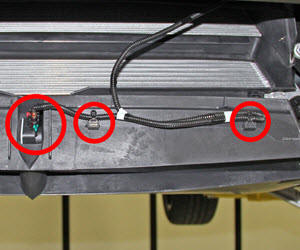
- Remove the active louver from the vehicle.
Installation procedure is the reverse of removal, except for the following:
During reinstallation, align the guide pins on the top of the louver with the slots in the condenser fan module, then rotate the base of the louver towards the vehicle. Ensure that the louver is secure.
Run the Toolbox Thermal System Test.
HVAC Nose Duct (Remove and Replace)
RemoveInstallation
Installation procedure is the reverse of removal, except for the following:
If equipped, transfer the battery-backed siren to the new HVAC nose duct (refer to procedure).