Tesla Model X: Antenna - Passive Entry - Front (Remove and Replace)
Tesla Model X 2015-2026 Service Manual / Electrical / Antenna - Passive Entry - Front (Remove and Replace)
Removal
- Remove the HEPA filter duct (refer to procedure).
-
Move the coolant reservoir away from the
working area:
- Ensure that the reservoir cap is fully secured.
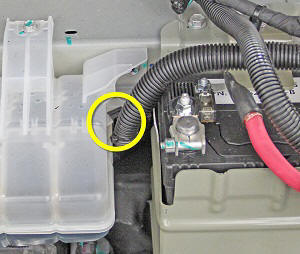
-
Release the 12V harness clip from the
coolant reservoir.
-
Disconnect the coolant fluid level sensor
electrical connector.
-
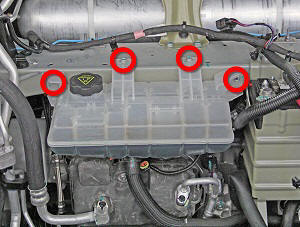
Remove the bolts (x4) that secure the
coolant reservoir to the front crossmember (torque 6 Nm).
- Move the coolant reservoir towards the front of the vehicle.
-
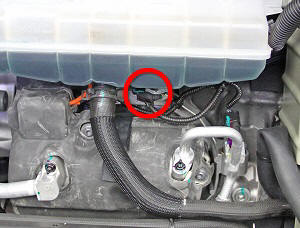
Remove the screws (x2) that secure the front
passive entry antenna to the bottom of the front crossmember.
-
Disconnect the electrical connector from the
passive entry antenna:
-
Pull the red locking tab away from the
connector.
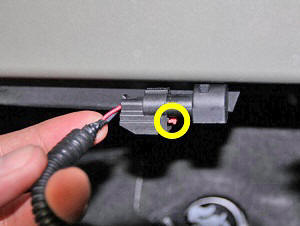
-
Compress the black tab.
- Release the electrical connector.
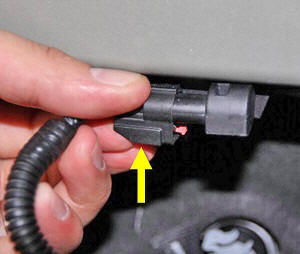
-
Pull the red locking tab away from the
connector.
-
Use a trim tool to carefully release the
passive entry antenna from the bottom of the front crossmember.
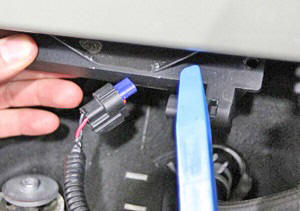
- Remove the passive entry antenna from the vehicle.
Installation procedure is the reverse of removal, except for the following:
- Clean the mounting surface with alcohol wipes.
- Apply double sided tape to the passive entry antenna, if necessary.
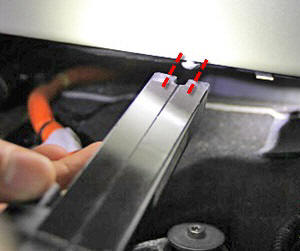
- Loosely install the RH screw that secures the passive entry antenna.
-
Place the passive entry antenna against the
screw so that the notch is flush with the screw.
- Pivot the passive entry antenna so that it is in the desired location.
-
Fully install both screws that secure the
passive entry antenna to the front crossmember (torque 3.5 Nm).
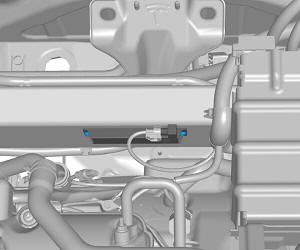
Note: The following
image shows the electrical connector already connected.
- Apply firm pressure to the passive entry antenna for at least 15 seconds to ensure that the double sided tape is fully adhered to the front crossmember.
-
Connect the electrical connector to the passive
entry antenna.
Note: Remember to push the red locking tab in.