Tesla Model X: Fan - Condenser (Remove and Replace)
Removal
Remove the radiator (refer to procedure).
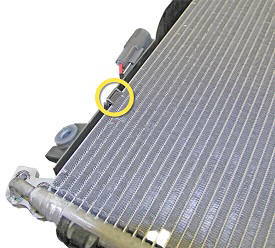
Release the tab that secures the RH side of the condenser to the
condenser fan shroud.
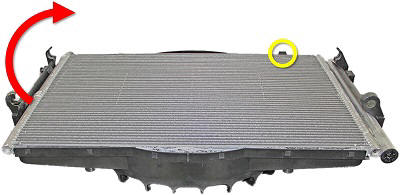
Release the tab that secures the LH side of the condenser to the
condenser fan shroud and pivot the condenser towards the LH side of
the condenser fan assembly.
Lift the condenser off of the condenser fan assembly and place
it on a soft, clean surface.
Installation
Installation procedure is the reverse of removal.
READ NEXT:
Note: The desiccant bag in the receiver dryer is a
serviceable item and must be replaced every 2 years, whenever the
system is opened to ambient air for an extended time, or when an A/C
sy
Removal
Remove the underhood storage unit (refer to procedure).
Recover the A/C refrigerant (refer to procedure).
Perform the electrical isolation procedure (refer to procedure).
Removal
Remove the underhood storage unit (refer to procedure).
Recover the A/C refrigerant (refer to procedure).
Perform the electrical isolation procedure (refer to procedure).
SEE MORE:
Warning: Only technicians who have been trained in High
Voltage Awareness are permitted to perform this procedure. Proper
personal protective equipment (PPE) and insulating HV gloves with a
minimum rating of class 00 (500V) must be worn any time a high
voltage cable is handled. Refer
Warning: "Jack mode" must
be activated on vehicles with air suspension before lifting the
vehicle. Failure to do this might lead to suspension damage and
could cause serious personal injury.
Note: Vehicles with air
suspension might need the suspension to be set to "High" or "Very