Tesla Model X: HVAC Assembly - Front (Remove and Replace)
Tesla Model X 2015-2026 Service Manual / Thermal Management / HVAC Assembly - Front (Remove and Replace)
Warning: Only technicians who have been trained in High Voltage Awareness are permitted to perform this procedure. Proper personal protective equipment (PPE) and insulating HV gloves with a minimum rating of class 00 (500V) must be worn any time a high voltage cable is handled. Refer to Tech Note TN-15-92-003, "High Voltage Awareness Care Points" for additional safety information. Removal
- Open the liftgate and both front doors.
- Remove the cross car beam (refer to procedure).
- Perform the electrical isolation procedure (refer to procedure).
- Disconnect the PTC heater HV cable connector from the forward
junction box (FJB).
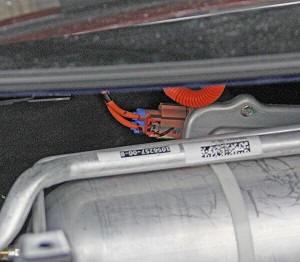
- Push the HV cable grommet through the bulkhead towards the
interior of the vehicle.
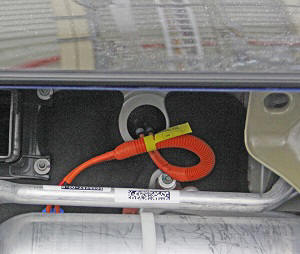
- Carefully pull the HV cable through the bulkhead into the cabin of the vehicle.
- Release the HVAC drain hose from the nipple on the HVAC assembly. Note: Place suitable absorbent material around the affected area to absorb any possible fluid spillage.
- Disconnect any remaining electrical connectors from the HVAC assembly.
- Remove the bolts (x2) that secure the HVAC assembly to the cowl
(torque 6 Nm).
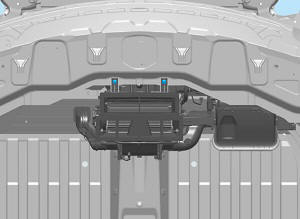
- Remove the nuts (x5) that secure the HVAC assembly to the
bulkhead (torque 6 Nm).
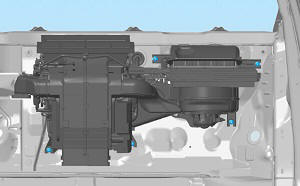
- Remove the HVAC assembly from the vehicle.
Caution: Plug pipe connections to prevent ingress of moisture or dirt.
InstallationInstallation procedure is the reverse of removal.