Tesla Model X: HVAC Assembly - Rear (Remove and Replace)
Tesla Model X 2015-2026 Service Manual / Thermal Management / HVAC Assembly - Rear (Remove and Replace)
Remove
- Open the liftgate and the rear doors.
- Recover refrigerant from the vehicle (refer to procedure).
- Perform the electrical isolation procedure (refer to procedure).
- If the vehicle is equipped with a subwoofer, remove it (refer to procedure). Otherwise, remove the RH parcel shelf support (refer to procedure).
- Remove the ducting pieces (x2) from the vehicle.
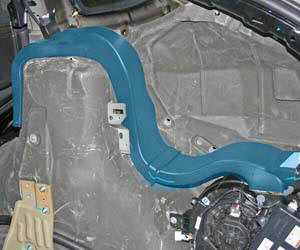
- Release the push clips (x2) that secure the frame rail panel.
- Disconnect the HV cable from the rear of the PTC heater.
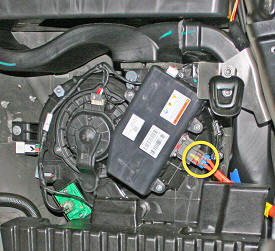
- Disconnect the 12V electrical connector from the top of the PTC
heater.
- Remove the mid aero shield (refer to procedure).
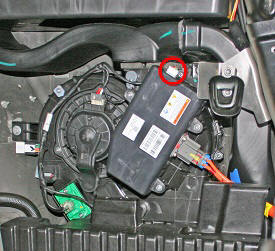
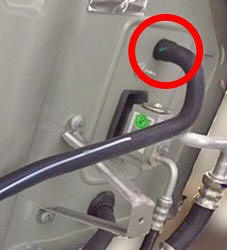
- Release the drain hose from the nipple on the bottom of the rear
HVAC assembly.
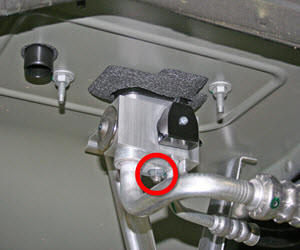
Note: Components have been removed in this graphic to aid clarity.
- Working from beneath the vehicle, remove that nut that secure
the pipes to the condenser (torque 10.5 Nm). Gently pull the pipes
away from the condenser.
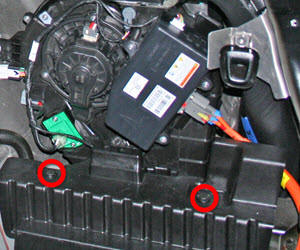
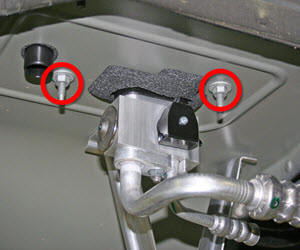
- Remove that nuts (x2) that secure HVAC assembly to the body
(torque 8 Nm).
- Lower the vehicle.
- Working from inside the vehicle, disconnect the LV connections (x2) from the front of the HVAC assembly.
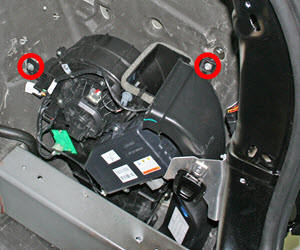
- Release the bolts (x2) that secure the HVAC assembly to the body
(torque 6 Nm).
- Pull the HVAC assembly upward to remove it from the vehicle.
Installation procedure is the reverse of removal, except for the following:
Note: Inspect the O-rings. Replace as necessary.
Caution: Lubricate new O-rings with clean refrigerant oil. Use Toolbox to update or redeploy the firmware.