Tesla Model X: Knuckle - Suspension - Front - LH (Remove and Replace)
Removal
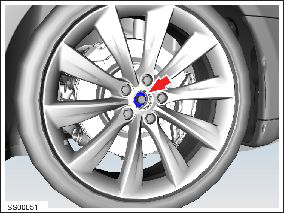
- Remove the center cap from the front LH wheel and loosen the
axle nut (torque 205 Nm).
- Remove the front dust shield (refer to procedure).
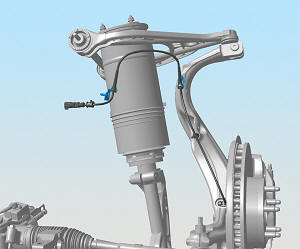
- Release the wheel speed sensor harness from the bracket on the
knuckle and bracket on the body of the vehicle.
Note: The following image shows the rotor still installed.
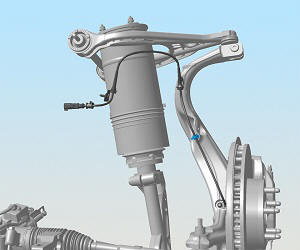
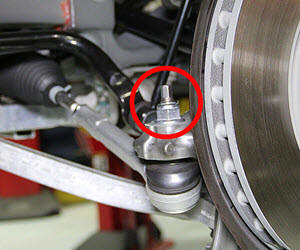
- Release the fir tree clip that secures the wheel speed sensor
harness to the knuckle.
Note: The following image shows the rotor still
installed.
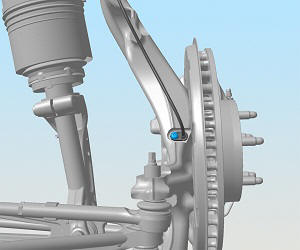
- Remove the bolt that secures the wheel speed sensor to the
knuckle (torque 8 Nm).
Note: The following image shows the rotor still
installed.
- Carefully wrap the wheel speed sensor in non-conductive protective material to prevent damage. Move the wheel speed sensor out of the working area.
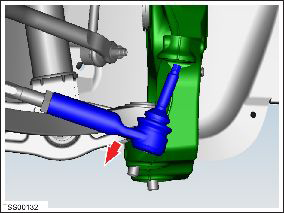
- Remove the nut that secures the tie rod end to the knuckle
(torque 104 Nm).
Caution: To prevent ball joint damage, always hold the ball joint pin with a wrench while loosening or tightening the lock nut.
- Release the tie rod end from the knuckle.
- Remove the nut that secures the sway bar link to the knuckle
(torque 70 Nm).
Caution: To prevent ball joint damage, always hold the ball joint pin with a wrench while loosening or tightening the lock nut.

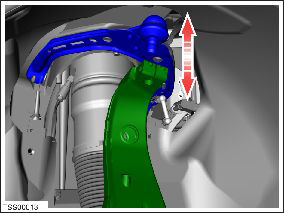
- Remove the bolt and nut that secure the upper control arm ball
joint to the knuckle (torque 60 Nm).
Caution: Take care not to damage component(s).
- Release the knuckle from the upper control arm.
- Remove and discard the nut and washer that secure the front axle nut.
- Use a deadblow hammer to release the halfshaft from the hub. Caution: Take care not to damage component(s).
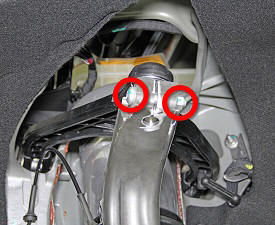
- Remove the nuts (x2) that secure the lower link ball joints to
the knuckle (torque 195 Nm).
Caution: To prevent ball joint damage, always hold the ball joint pin with a wrench while loosening or tightening the lock nut.
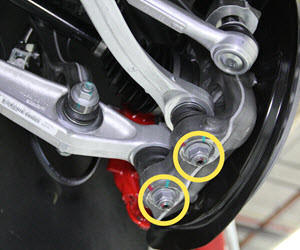
- Release the lower links from the knuckle.
- Remove the knuckle from the vehicle.
Installation procedure is the reverse of removal, except for the following:
Caution: Replace all nylon-insert locknuts.
Caution: Only fully tighten suspension nuts and bolts when the vehicle is on a 4-post lift and the suspension is in the ride height position.
Note: Clean the affected areas before installation.
- Transfer the vehicle to a 4 post lift (refer to procedure).
- Torque all suspension components while the vehicle is at ride height.