Tesla Model X: Motor - Headrest - Driver's (Remove and Replace)
Removal
- Remove the driver's headrest trim (refer to procedure).
- Disconnect 12V power (refer to procedure).
- Carefully cut the cable tie that secures the headrest motor
harness to the LH seat frame.
Caution: Take care not to damage component(s).
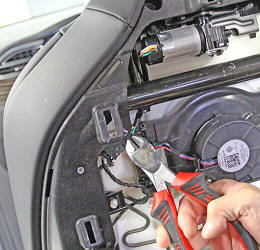
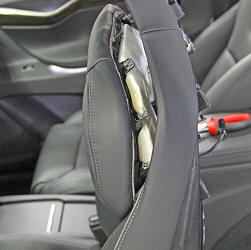
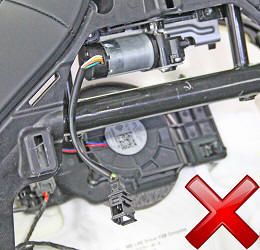
- Disconnect the headrest motor electrical connector.
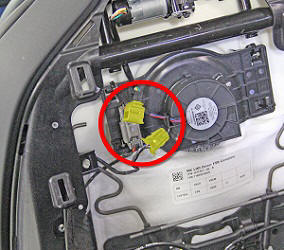
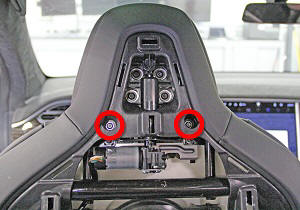
Electrical connector highlighted - Remove the screws (x2) that secure the headrest trim to the seat
(torque X Nm).
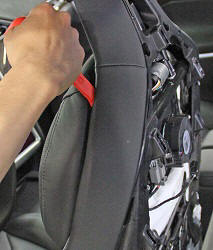
Note: The following image shows the headrest trim still installed.
- Use a trim tool to release the clips (x6) that secure the upper
seat backing to the seat frame.
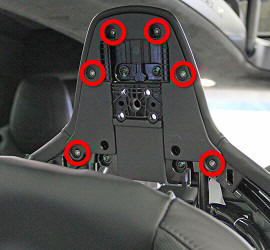
- Remove the screws (x6) that secure the headrest frame plate to
the seat frame (torque 1.5 Nm).
Caution: Take care not to overtorque the screws.
- Release the clips (x3) that secure the headrest frame plate to the seat frame. Remove the headrest frame plate.
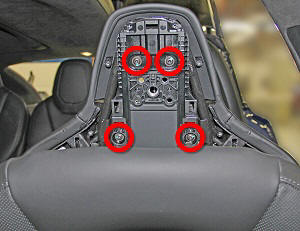
- Remove and discard the screws (x4) that secure the headrest
motor assembly to the seat frame (torque 8 Nm).
- Remove the headrest motor assembly from the vehicle and place it on a soft, clean surface.
- Release the headrest motor plate from the headrest motor
assembly.
Caution: Take care not to damage component(s).
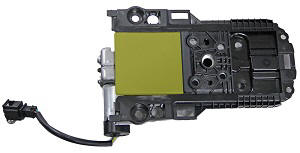
Headrest motor plate highlighted
Installation procedure is the reverse of removal, except for the following:
Caution: Replace any broken clips.
Caution: Replace all Patchbolt(s).
- Transfer the headrest motor plate to the new headrest motor assembly.
- Use the datum to align the headrest assembly motor.
- Ensure that the headrest motor harness is routed in front of the
seat frame.
Front latch Rear latch 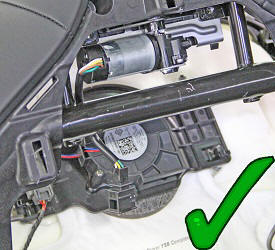
- Use a new cable tie to secure the headrest motor harness to the seat frame. Remove any excess tie.
- Use Toolbox to perform the "Seat Calibration" procedure.
Note: If the same headrest motor was reinstalled, it is not necessary to perform the "Seat Calibration" procedure. Cycle the seat fully forward and rearward 2-3 times to calibrate the headrest.