Tesla Model X: Rear Halfshaft Assembly - Large Drive Unit - LH (Remove and Replace)
Special tool(s) required for this procedure:
| Part Number | Description |
| 1000991 | Axle Extractor Tool |
- Remove the LH rear wheel arch liner (refer to procedure).
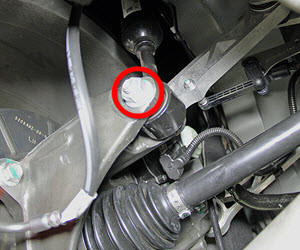
- Remove and discard the axle nut (torque 245 Nm). The axle nut
must be replaced during reinstallation.
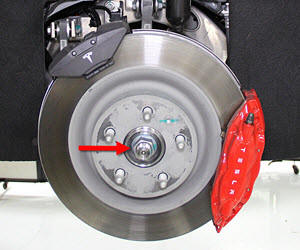
- Remove the wedge-lock washer.
- Put the vehicle into "Tow" mode.
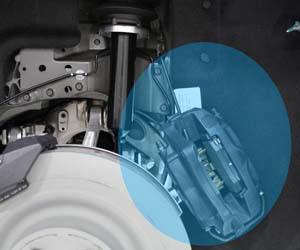
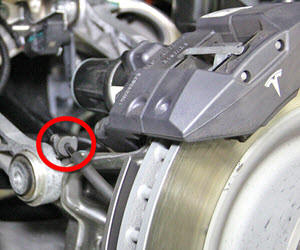
- Loosen the bolts (x2) that secure the brake caliper to the
knuckle (torque 120 Nm). Remove and support the calipers.
Caution: To avoid damage to the brake line, the brake caliper must be supported at all times.
- Release the bolt that secures the upper link to the knuckle
(torque 140 Nm).
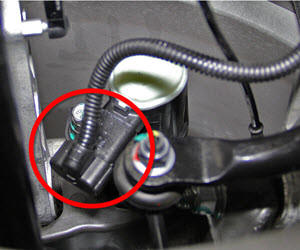
- Disconnect the harness from the electric park brake (EPB)
caliper.
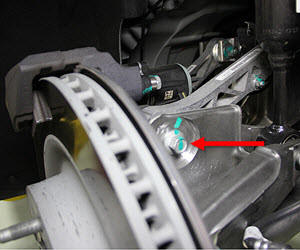
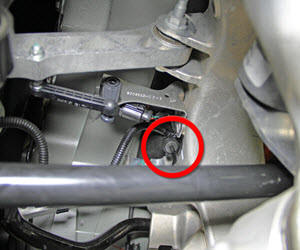
- Release the bolt that secures the toe link to the knuckle
(torque 130 Nm).
.jpg)
- Release the nut and bolt that secure the damper to the knuckle
(torque 140 Nm).
- Release the ABS harness from the bracket on the knuckle.
- Remove the mid aero shield (refer to procedure).
- Release the ABS harness from the bracket on the subframe.
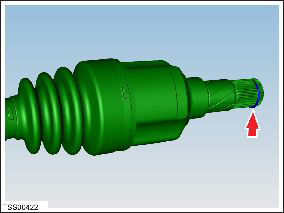
- Tap the exposed end of the halfshaft with a nylon mallet to release it.
- Swing the brake rotor and knuckle assembly outward and release the outer halfshaft spline from the rear hub, using a driver to disengage the axle from the hub splines.
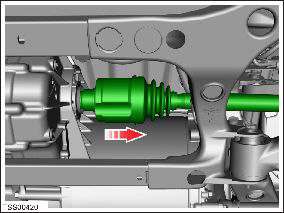
- Use the axle extractor tool to release the halfshaft from the
transmission.
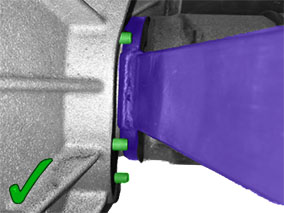
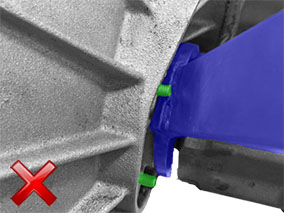
Caution: Ensure that the axle extractor tool does not contact any of the differential retaining studs.
Note: If the halfshaft is difficult to release, rotate the halfshaft slightly, then try releasing the halfshaft again.
- Carefully withdraw the halfshaft assembly from the vehicle.
Caution: To avoid damage to the halfshaft boots and oil seals, exercise caution when removing and installing halfshafts.
Caution: Plug the transmission opening to prevent ingress of dirt or moisture.
InstallationInstallation procedure is the reverse of removal, except for the following:
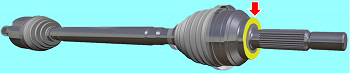
Caution: Ensure that the new halfshaft has a snap-ring already installed. If it does not, then install a different halfshaft that has a snap-ring already installed. Return any halfshafts without a snap-ring using the MRB process. Do not remove or reuse snap-rings.
- Apply approximately 1 gram of Molykote M-77 Lubricant Paste
to the outboard side of the halfshaft to the hub mating face.
- When installing the halfshaft into the drive unit:
- Ensure that the opening of the snap ring is facing towards the bottom of the drive unit.
- Do not damage or displace the oil seal.
- Verify that the halfshaft is fully seated by carefully pushing it into the drive unit until there is an audible "click" from the snap ring.
- Pump the brake pedal at least 5 times to seat the pads against the brake rotors.
Warning: Always check that the brake pads are seated correctly before driving the vehicle.
Caution: Only fully tighten suspension nuts and bolts when the vehicle is on a 4-post lift and the suspension is in the ride height position.Caution: Ensure that the bolt that secures the spring assembly to the knuckle is inserted towards the rear of the vehicle; the head of the bolt faces the front of the vehicle and the nut is tightened at the rear.
- Perform a four wheel alignment check (refer to procedure).