Tesla Model X: Trim - C-Pillar - Lower - LH (Remove and Replace)
Remove
Move the 2nd row seat to the Easy Entry position.
Remove the welcome plate (refer to procedure).
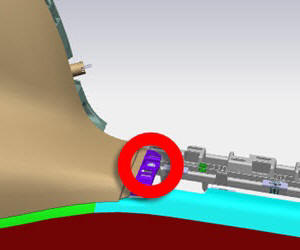
Remove the bolt that secures the lower C-pillar trim panel to
the body (torque 2.5 Nm).
Starting at the bottom of the C-pillar trim panel, pull the
panel up to release the clips that secure it to the body.
Caution: Replace any broken
clips.
Remove the trim panel.
Install
Installation procedure is the reverse of removal.
READ NEXT:
Remove
Remove the lower C-Pillar trim panel (refer to procedure).
Remove the rear trunk side trim panel (refer to procedure).
Release the 2 screws that secure the trim panel (torque
Remove
Remove the LH rear trunk carpet and trim assembly (refer to
procedure).
Remove the screws that secure the bottom of the C-pillar upper
trim panel to the body (torque 3 Nm).
Removal
Remove the upper C-Pillar trim panel (refer to procedure).
Release the push clips (x2) and nut (x1) that secure the parcel
shelf support to the body (torque 1.25 Nm).
SEE MORE:
Removal
Remove the front fascia (refer to procedure).
Disconnect the electrical connector from the air quality sensor.
Twist the sensor counterclockwise then pull it away from the front end
module.
Caution: Take care not to damage component(s).
Remove the air quality sensor from t
Removal
Remove the rear door trim panel (refer to procedure).
Disconnect 12V power (refer to procedure).
Disconnect the electrical connectors (x2) from the bottom of the
rear door controller.
Remove the screws (x3) that secure the rea