Tesla Model X: Charger (Install )
Tesla Model X 2015-2024 Service Manual / High Voltage System / Charger (Remove and Replace) / Charger (Install )
Install
Installation procedure is the reverse of removal, except for the following: Caution: Replace all Patchbolt(s).Warning: The water slide bracket must be reinstalled on the rear of the charger to ensure proper performance in the event of a collision.
- Clean the charger mounting area on the vehicle before installing the new charger.
- Ensure that the new charger has a new foam gasket on the bottom of the charger. Do not reuse the foam gasket.
- The forward HV cables must be inserted into the charger before it is permanently mounted. Place the charger in the approximate mounting position, tilted toward the center of the vehicle, then connect the forward HV cables.
- The lugs of the forward HV cables must be positioned in front of the busbars.
- Warning: The water slide bracket must be reinstalled on the rear of the charger to ensure proper performance in the event of a collision.
- Note: The charger is difficult to position properly. Position the charger in the approximate position, then check under the vehicle to see the position of the coolant nipple, electrical connector, and studs relative to the holes in the body. Adjust the position of the charger accordingly.
- Clean the adhesive residue on the charger and charger access
panel with an alcohol wipe before installing a new warranty
label.
.
.jpg)
- Ensure that the forward HV cable grommet is fully seated on the body.
- Tip: If the forward HV cable grommet is difficult to insert into the body, apply P-80 emulsion to the edges of the grommet.
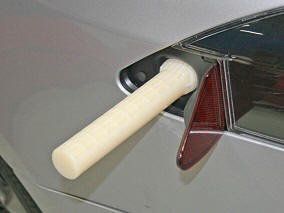
- Before securing the HV cables to the charge port, insert the
charge port alignment tool into the charge port.
.

- Perform a firmware update.
Tip: Connect 12V power and start the firmware update before reinstalling the components that were removed for access.
- Ensure that the vehicle charges as expected.
