Tesla Model X: Hub - Rear - LH (Remove and Replace)
Special tool(s) required for this procedure:
| Supplier | Part Number | Description |
| Tesla | 1062500-00-A | Magnetic Field Viewing Card |
| Tesla | 1082171-00-A | S-hook |
- Position the vehicle in preparation for raising it, but keep the vehicle at ground level at this time.
- Loosen the lug nuts on the LH rear wheel.
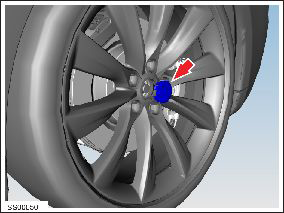
- Remove the wheel center cap.
- Remove the hub nut (torque 245 Nm).
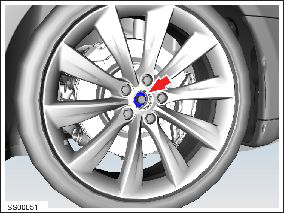
- Remove the wedge-lock washer.
- Use the park brake caliper release tool to release the park brake calipers (refer to procedure).
- Remove the rear wheel arch liner (refer to procedure).
- Remove the bolts (x2) that secure the brake caliper to the
knuckle (torque 120 Nm).
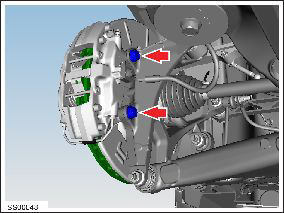
- Release the caliper and use the S-hook to support it. Caution: To avoid damage to the brake line, the brake caliper must be supported at all times.
- Remove the screw that secures the wheel speed sensor to the
knuckle (torque 8 Nm).
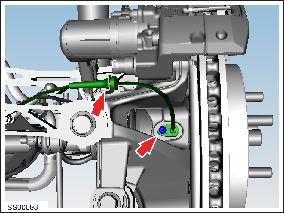
- Release the wheel speed sensor from the knuckle and tie it aside. Caution: Take care not to damage component(s).
- Remove the parking brake caliper (refer to procedure).
- Remove the screw that secures the brake rotor to the hub, then
remove the brake rotor (torque 17 Nm).

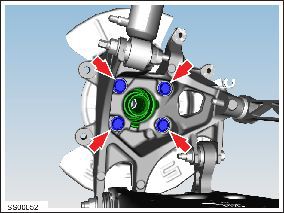
- Remove the bolts (x4) that secure the hub to the knuckle (torque
90 Nm).
Note: The hub and knuckle assembly is shown removed from the vehicle to aid clarity.
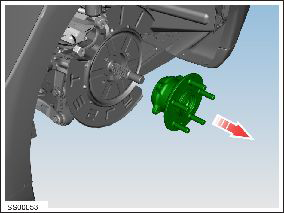
- Release the halfshaft from the hub, and remove the hub from the
knuckle. Place the hub on a non-magnetic surface.
Caution: A magnetic field from a pick-up tool or magnetic parts tray could permanently damage the magnetic pattern on the hub/bearing tone ring.
Installation procedure is the reverse of removal, except for the following:
Note: Clean the affected areas before installation.
- Clean the mating faces of the hub and disc.
- Use the magnetic field viewing card to ensure that the magnetic field on the tone ring is not damaged.
- After connecting the electric parking brake caliper harness, wrap the connector seam with electrical tape to prevent dirt ingress.
- Pump the brake pedal at least 5 times to seat the pads against the brake rotors.
Warning: Always check that the brake pads are seated correctly before driving the vehicle