Tesla Model X: Torque Rod - Active Spoiler - LH (Remove and Replace)
Tesla Model X 2015-2026 Service Manual / Exterior Fittings / Torque Rod - Active Spoiler - LH (Remove and Replace)
Removal
- Open the liftgate.
- Remove the LH and RH side liftgate trims (refer to procedure).
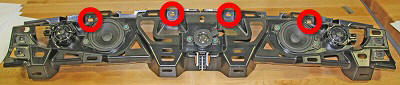
- Remove the bolts (x4) that secure the bottom of the speaker
shelf bracket (torque 2.5 Nm).

- Remove the bolts (x4) that secure the top of the speaker shelf
bracket (torque 2.5 Nm).
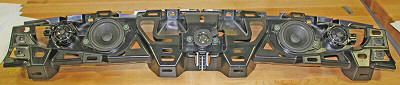
Note: Components have been removed in this graphic to aid clarity.
- Carefully lift the speaker shelf bracket and disconnect the electrical connectors (x5) for the speakers (x2), tweeters (x2), and chime.
- Remove the speaker shelf bracket from the vehicle.
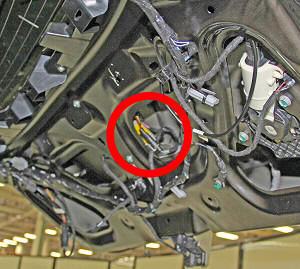
- Disconnect the electrical connectors (x2) from the active
spoiler motor.
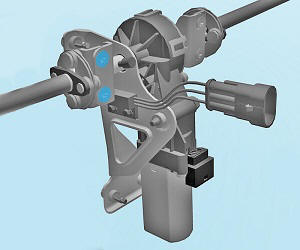
- Remove the screws (x2) that secure the torque rod to the active
spoiler motor (torque 6 Nm).
Tip: It might be helpful to stand at the base of the liftgate and look through the hole for the pull cup when locating the screws.
Note: Components have been removed in this graphic to aid clarity.
- Carefully lift the torque rod off of the active spoiler motor
and pull the torque rod inboard to release it from the active
spoiler hinge.
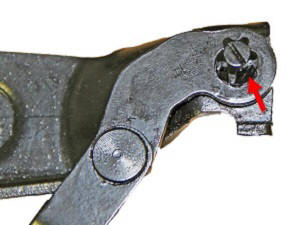
Note: There is a notch in the torque rod sleeve to ensure that it is installed correctly.
Notch in torque rod sleeve Notch in hinge key 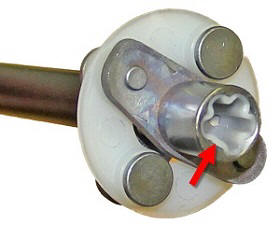
- Remove the torque rod from the vehicle.
Installation procedure is the reverse of removal, except for the following: Use the touchscreen to cycle the active spoiler up and down. Ensure that it works properly.