Tesla Model X: Tail Light Assembly - LH (Remove and Install)
Tesla Model X 2015-2026 Service Manual / Electrical / Tail Light Assembly - LH (Remove and Install)
Removal
- Remove the charge port assembly (refer to procedure).
- Pull the NVH padding away from the tail light to expose the fasteners and electrical connectors.
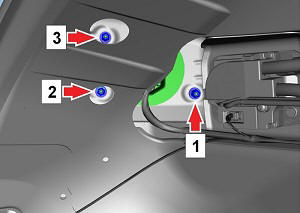
- Remove the nuts (x2) and bolt that secure the LH tail light to the body (torque 2.5 Nm).
-
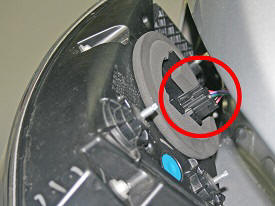
Working from outside the vehicle, rotate the
taillight towards the front of the vehicle expose the taillight
harness. Disconnect this harness and remove the taillight.
- Place the tail light on a soft, clean surface.
Installation procedure is the reverse of removal, except for the following:
-
Prior to installing the components that were
removed for access, insert a 1 mm feeler gauge between the body and
the base of the tail light. While holding the feeler gauge in place,
tighten the nuts in the order shown (torque 2.5 Nm).
Feeler gauge inserted Torque order 
- Ensure proper operation of the tail light.