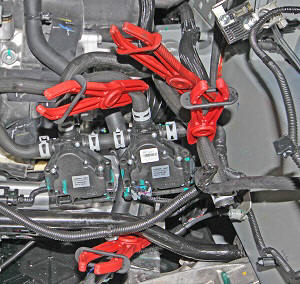
Tesla Model X: 4 Way Coolant Valve - Series/Parallel (Remove and Replace)
Tesla Model X 2015-2026 Service Manual / Thermal Management / 4 Way Coolant Valve - Series/Parallel (Remove and Replace)
Removal
- Remove the cooling fan module (refer to procedure).
- Remove the battery cage (refer to procedure).
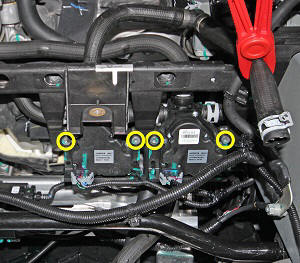
- Remove the bolts (x4) that secure the 3-way and 4-way valves to
the plastic support beam (torque 5 Nm).
- Release the clips (x2) that secure the coolant hose to the
plastic support beam.
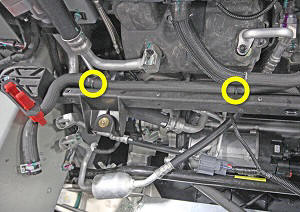
- Remove the bolts (x2) that secure the plastic support beam to
the front frame rails (torque 6.5 Nm).
- Remove the plastic support beam from the vehicle.
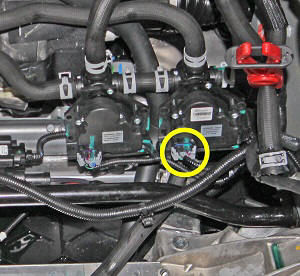
- Disconnect the electrical connector from the 4-way valve.
- Place a container beneath the 4-way valve to catch spilled coolant.
- Clamp the following coolant hoses:
- 4-way valve to Battery Pump 1
- 4-way valve to coolant reservoir
- HV battery to 4-way valve
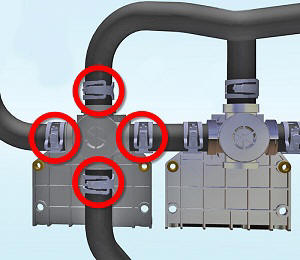
- Release the locking rings (x4) that secure the coolant hoses to
the 4-way valve. Release the coolant hoses from the nipples on the
4-way valve.
Tip: Release the locking ring that secures the coolant hose
that goes to the 3-way valve first. This provides more
mobility when releasing the remaining locking rings.
Note: Components have been removed in this graphic to aid
clarity.
- Remove the 4-way valve from the vehicle.
Installation procedure is the reverse of removal, except for the following:
- Recharge the refrigerant.
- Refill and bleed the cooling system (refer to procedure).