Tesla Model X: Condenser (Remove and Replace)
Removal
Remove the radiator (refer to procedure).
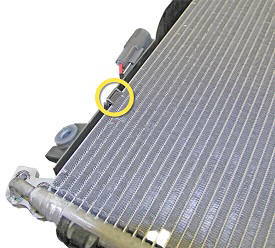
Release the tab that secures the RH side of the condenser to the
condenser fan shroud.
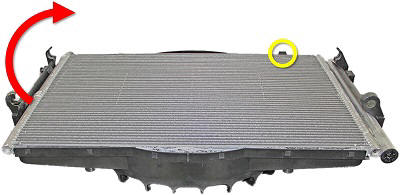
Release the tab that secures the LH side of the condenser to the
condenser fan shroud and pivot the condenser towards the LH side of
the condenser fan assembly.
Lift the condenser off of the condenser fan assembly. Retain the
condenser fan assembly.
Installation
Installation procedure is the reverse of removal.
READ NEXT:
Removal
Remove the radiator (refer to procedure).
Release the tab that secures the RH side of the condenser to the
condenser fan shroud.
R
Note: The desiccant bag in the receiver dryer is a
serviceable item and must be replaced every 2 years, whenever the
system is opened to ambient air for an extended time, or when an A/C
sy
Removal
Remove the underhood storage unit (refer to procedure).
Recover the A/C refrigerant (refer to procedure).
Perform the electrical isolation procedure (refer to procedure).
SEE MORE:
Special tools required for this procedure:
Supplier
Part Number
Description
1080580-00-A
Heat gun
1080603-00-A
Infrared thermometer
Removal
Remove the passenger side door trim panel (refer to procedure).
Release the screw that secures the window switch to the door
panel (torque 0.8 Nm).
Disconnect the harness from the base of the switch.