Tesla Model X: Recover Refrigerant and Verify Charge
Tesla Model X 2015-2024 Service Manual / Thermal Management / A/C Refrigerant Recovery and Recharge (Remove and Replace) / Recover Refrigerant and Verify Charge
Warning: R134a and R1234yf are hazardous liquids and, if handled incorrectly, can cause serious injury. Suitable protective clothing, consisting of face protection, heat-proof gloves, rubber boots and apron or waterproof overalls, must be worn when carrying out operations on the air conditioning system.
Note: Before beginning this section, complete the "Set Up HVAC Machine" section.
- Connect a laptop with Toolbox to the vehicle.
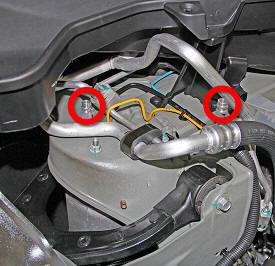
- Remove the rear underhood apron (refer to procedure).
- Remove the dust caps from the vehicle's high-side and low-side
service ports.
- Connect the high-side (red) hose and low-side (blue) hose from the HVAC machine to the vehicle's high-side and low-side service ports.
- Verify that the oil recovery tank is empty.
- In the Toolbox "Fluid Drain and Fill" panel, select the "Refrigerant Fill" box, then select "Start Fluid Drain/Fill" from the "Routine" dropdown menu. Press the Start button.
- Follow the HVAC machine instructions for recovering refrigerant from the vehicle. Note: In order to fully purge refrigerant and remove air, moisture, and contaminants, it is important to apply the appropriate vacuum for 30-45 minutes.
- Measure and record the quantity of refrigerant recovered from
the system.
- Model X equipped with a rear HVAC system: The amount of refrigerant recovered should be approximately 960-1000 g.
- Model X without a rear HVAC system: The amount of refrigerant recovered should be approximately 700-740 g.
- Record the amount of oil removed from the system by checking the
level in the lower clear tank; this is the amount of oil to add to
the system during charge, assuming that no components are being
replaced.
Note: If the recovery procedure is being performed
in order to replace a defective component, additional action
must be taken:
- If the A/C compressor is being replaced: The new A/C compressor is pre-filled with the total amount of oil used in the A/C system. Oil needs to be removed so that the amount of oil in the new A/C compressor equals the amount of oil in the old one. To do this, use a digital scale to weigh both the old and new A/C compressors. Turn the new one upside down to drain a small amount of oil, then re-weigh it. Repeat this process until the new A/C compressor weighs the same as the old one.
- If parts other than the A/C compressor are being replaced: Drain all oil from defective components and note how much is removed. Add this amount to the amount recorded from earlier in this step; this is the correct amount of oil to add during system charge.
- Calculate how much oil to add to the system; the amount removed from the system during recovery plus the amount removed from any defective component(s). Note: Refer to the end of the "Recover Refrigerant and Verify Charge" section for more information.
- In the Toolbox "Fluid Drain and Fill" panel, select the "Refrigerant Fill" box, then select "Start Fluid Drain/Fill" from the "Routine" dropdown menu. Press the Start button.
- Follow the HVAC machine instructions for pulling a vacuum and
charging the vehicle:
- Pull a vacuum into the HVAC system.
- Set the refrigerant charge to the amount shown in the fluid capacities table .
- Verify that the upper clear bottle on the HVAC machine contains the same amount of POE spec ND-11 oil as noted in step 1 of this section.
- Robinair AC1234-7 machines only: If desired, use the "UV Dye" option to inject leak detection dye.
- Initiate the recharge procedure on the HVAC machine. Note: Recharge the system through the high side hose.
- In the Toolbox "Fluid Drain and Fill" panel, click the Stop button. Note: The HVAC and Chiller solenoids are now closed.
- Reinstall the dust caps on the high and low side service ports. If either dust cap is missing, replace it to prevent future contamination. Note: The HVAC and Chiller solenoids are now closed.
- Turn on the cabin A/C and verify operation.
- Re-install the rear underhood apron.